How to Uninstall FileZilla for Mac?
- Catherine
- Sep 16,2020
- 2694
This guide is all about guiding you how to Uninstall FileZilla for Mac computer. I show you step by step how to get rid of FileZilla and leftovers completely, how to use a professional uninstaller tool to clean out any undesired programs a few seconds.
Tips: If you need a professional uninstaller tool for removing any Mac programs, then click the button below to get started immediately.
FileZilla Overview
FileZilla has released its new version of 3.50.0 that is able to fix the bug of tardigrade integration. FileZilla is a fast, practical and visually interfacial FTP client and server-side open-source program. In the aspect of protocols, FileZilla not merely supports FTP but also FTP over TLS (FTP), SSH File Transfer Protocol (SFTP), and IPv6 network. Taking the functions into consideration, FileZilla also won’t let you feel disappointed. It will cater all your needs about bookmarks, dragging and dropping, file name filter, remote file search, and more. Furthermore, FileZilla client is available for Windows, macOS, and Linux.
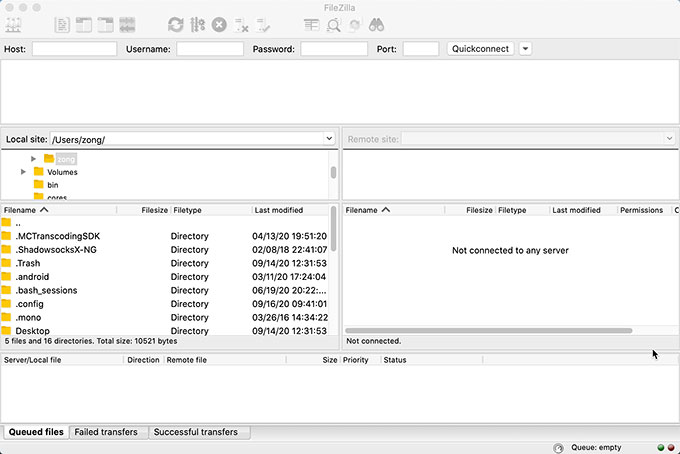
Compared to other FTP clients, FileZilla delivers the following features:
- Easy to use
- Support FTP, FTP and support SSL/TLS (FTPS) protocol, SSH file transfer protocol (SFTP)
- Support for IPv6 protocol
- Multiple languages available
- Support breakpoint resume
- Supports larger files than 4GB
- Support site manager
- Support transfer queue management
- Support bookmarks
- Support the dragging and dropping functionSupport transmission speed limit function
- Support filename filter
- Support folder comparison function
- Support network setup wizard
- Support remote file editing function
- Keeps the links
- Support HTTP/1.1, SOCKS5 and FTP Proxy
- Synchronous folder browsing
- … much more
How to Uninstall FileZilla for macOS?
Wondering how to uninstall FileZilla in Mac computer? You will get two methods about how to remove a Mac app successfully. The first method will use manual way, means you will uninstall FileZilla and figure out leftovers by your own hands. The second method will use the professional uninstaller tool named Osx Uninstaller, which is able to uninstall FileZilla automatically and completely.
First Method: Remove FileZilla Through Manual Way
This is a common-used method to uninstall FileZilla by Mac Move to Trash function. Follow the step by step guide as followed.
Step 1: Close all process related with the FileZilla app, as well as its associated activities running in the background. You need to click Finder > double-click Applications folder > double-click Utilities folder.
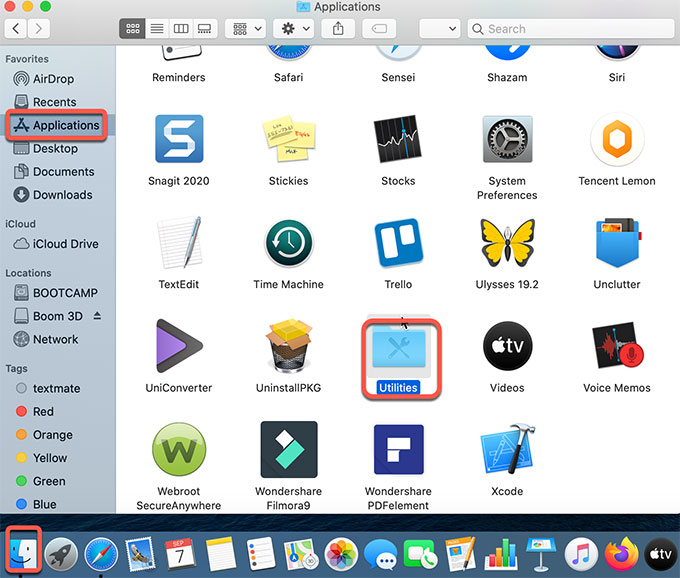
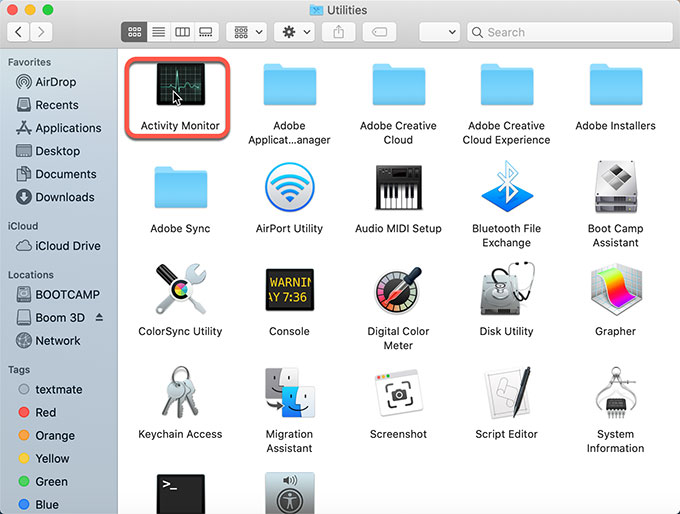
Double-click Activity Monitor.
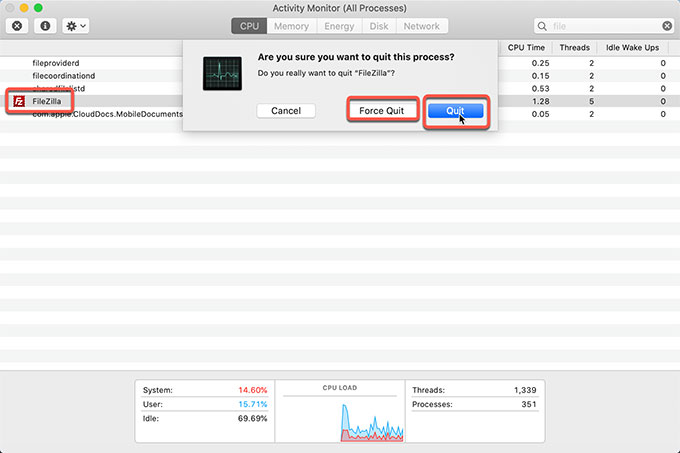
In the Activity Monitor, choose CPU tab > select the FileZilla app > click X button > click Quit or Force Quit to close the application.
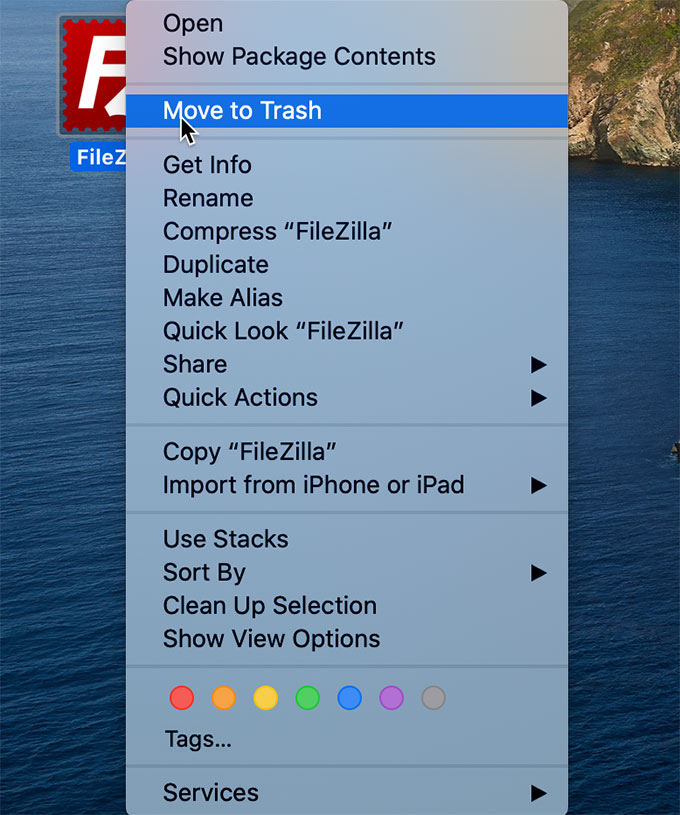
Step 2: Open Finder in the Dock > open Applications folder or the location where the FileZilla app is located in > select & right-click the FileZilla app > choose the Move to Trash option from the pop-up menu.
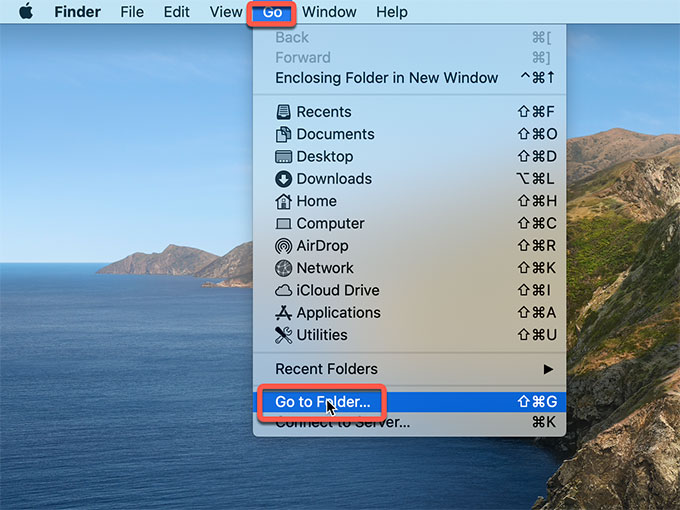
Step 3: Open Finder > click Go > click Go to folder… > enter the FileZilla directory path (type a directory path or filename) > click Go. You need to delete FileZilla leftover files and registry items correctly, any wrong deletion may cause some crash issues.
Go to the below paths and delete files named as or started with FileZilla.
~/Library/Application Support/
~/Library/Caches/
~/Library/Logs/
~/Library/Preferences/
~/Library/Saved Application State/

Step 4: Open Trash in the Dock> right click on FileZilla > click Empty Trash.
Second Method: Uninstall FileZilla Through Osx Uninstaller
Please note: A complete removal of any Mac program assumes that you should have deleted all remnants successfully. For any users who feel overwhelmed with a complete program removal, we suggest try the automatic uninstaller tool of Osx Uninstaller. Next, you will know how you can use the Osx Uninstaller tool to uninstall FileZilla like a breeze.
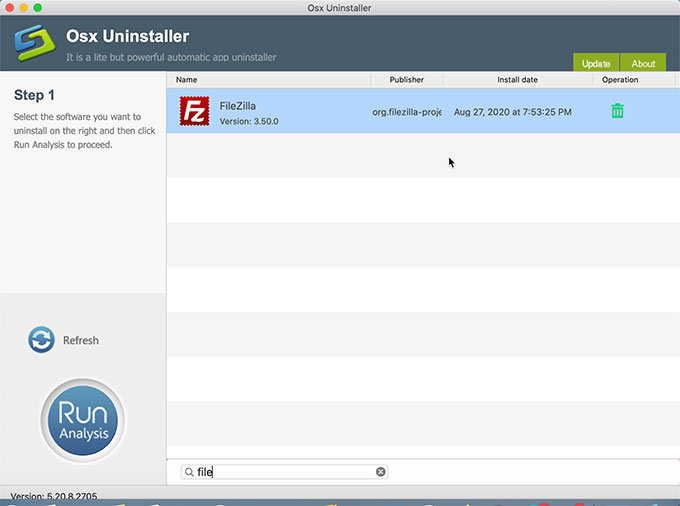
Step 1: Launch Osx Uninstaller if you’ve gotten it installed on your computer. Select the FileZilla program on the right-side of the Step 1 page. Or search FileZilla. Then click Run Analysis or click the Delete icon.
Step 2: Click Complete Uninstall > click Yes to make sure you want to uninstall FileZilla now.
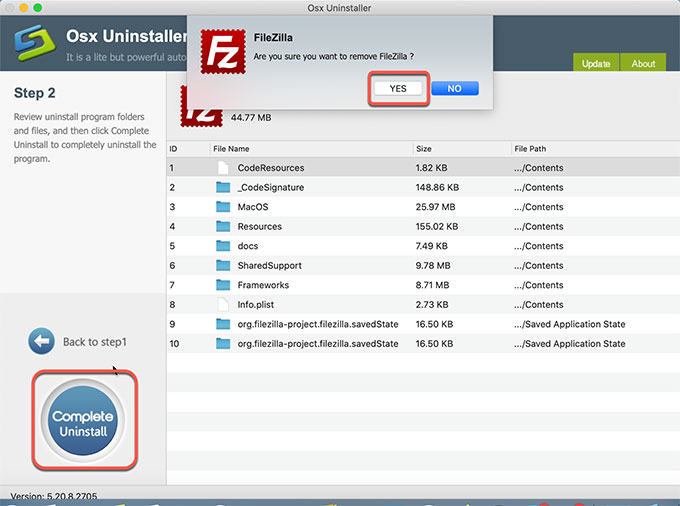
The Osx Uninstaller tool will automatically delete all leftover files for you. Once done, Restart your Mac.
Conclusion
Till now, if you may have known how to uninstall FileZilla for Mac computers? You may have gained an understanding of all the steps involved in the FileZilla program removal process. You are also introduced to the usage of Osx Uninstaller and how it works for cleaning out remnants. Thus, it is the time to choose which method you want to have a try. If you prefer a more relax and easier way to get rid of any unwanted programs from Mac successfully, the technical Osx Uninstaller tool is a priority.
Download Osx Uninstaller through the button below.
Leave your comments here:
Recent posts
Categories
- Apple Infos (19)
- Application Guides (8)
- How-to Guides (25)
- Mac Apps (3)
- Mac Hardware (1)
- Mac Tips & Tricks (11)
- macOS (12)
- Security Issue (11)
- Tech News (14)
- Uninstall Tutorials (48)
Archive
- August 2021
- June 2021
- April 2021
- March 2021
- February 2021
- January 2021
- December 2020
- November 2020
- October 2020
- September 2020
- March 2020
- February 2020
- September 2018
- August 2018
- July 2018
- June 2018
- May 2018
- April 2018
- March 2018
- February 2018
- January 2018
- December 2017
- November 2017
- October 2017
- September 2017
- August 2017
- July 2017
- June 2017
- May 2017
- April 2017
- March 2017
- February 2017
- January 2017
- December 2016
- November 2016
- October 2016
- September 2016
- August 2016
- July 2016

Comments