Remove Mac Apps
A Technical Site Providing Uninstall Tutorial For Mac OS X
- Home
- >>>
- Database
- >>>
- MP3 & Audio Software
- >>>
- clip snapshot
How To Uninstall clip snapshot from Mac OS
There are various kinds of software that you can install on your Mac, and it is quite easy to manage those apps on macOS. You can get an app from Mac’s App Store, discs or other websites, and then install it by dragging the app icon to the Applications folder or running the provided installer in the disk image or package file. Once you do not want to keep an app on your Mac, you can uninstall clip snapshot by multiple methods.
Struggling to uninstall unneeded applications from your Mac computer? Having trouble in removing the entire application components around the system? This tutorial will show you how to effectively uninstall clip snapshot in macOS or Mac OS X.
What should you do before uninstalling clip snapshot:
First of all, don’t rush to drag clip snapshot to the Trash. Before you start the uninstallation, you are supposed to quite the app if it is running, otherwise the uninstall may fail or trigger error message. There are several options for you to exit out of clip snapshot:
- (1) Right click on its icon on the Dock, and choose the Quit option;
- (2) Bring clip snapshot to the desktop, and choose Quit option from the Apple menu;
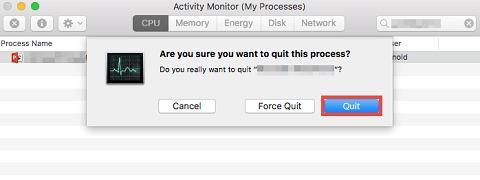
- (3) Launch the Activity Monitor from Dock, Launchpad or Spotlight > type clip snapshot in the search box > select the process pertaining to clip snapshot > click the “X” button on the upper left corner > click Quite in the pop-up dialog (if that fails, choose Force Quite).
After that you can carry out a clean uninstall either automatically or manually.
Perfectly Uninstall clip snapshot within Simple Clicks
There are many Mac utilities that claim to help hunt down all application files and delete them for you. If you do not want to dig down the system for removing clip snapshot, you can turn to a professional uninstall tool to accomplish the task effortlessly.
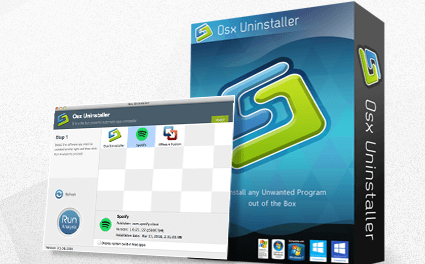
Here we would like to recommend Osx Uninstaller, a lightweight yet powerful app designed for all level users to perfectly remove problematic, stubborn or malicious apps. To completely uninstall clip snapshot and remove its vestiges, you just need to do 3 simple steps: launch > select > uninstall. Take a quick look at how it works.
Video: How to easily & thoroughly uninstall clip snapshot (or other Mac apps)
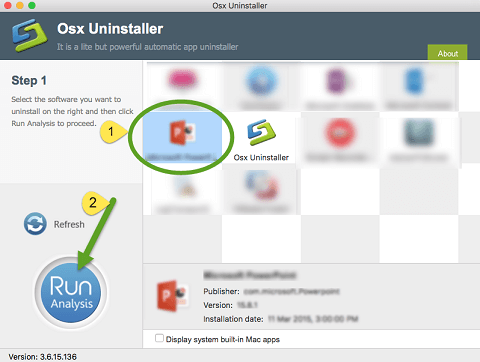
Step 1: launch Osx Uninstaller
> > Download Osx Uninstaller, install it on your Mac, and click to launch this tool.
Step 2: choose clip snapshot app
>> Select clip snapshot icon in the interface, and click Run Analysis button to run a scan.
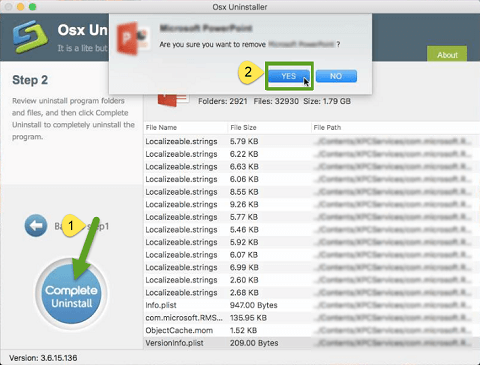
Step 3: perform the uninstall
>> Review the components belonging to clip snapshot that are scanned out, click Complete Uninstall button, and then click Yes in pop-up dialog to uninstall clip snapshot.
Once the removal is complete, click Back to Interface button to re-scan your Mac. So that’s it. The whole process may last less than one minute to complete. Osx Uninstaller is featured with intuitive interface, streamlined process and powerful engine, which enable all-level users to easily and fully delet clip snapshot from the Mac.
Manual Approaches to Uninstall clip snapshot on Mac
To uninstall clip snapshot without using 3rd party tool, you can adopt the conventional means. Besides, if you do not log in as an administrator user, you will be prompted to enter an administrator’s name and password when trying to delete an app by the steps below.
For the apps installed from Mac’s App Store:
- Click the Launchpad icon on the Dock, and then type clip snapshot in the Search box.
- As the target app appears, position the pointer over its icon, then press and hold until the icon starts to jiggle. And click the Delete button appearing in the app icon.
- Click Delete in the pop-up dialog to confirm the uninstallation of clip snapshot.
If you want to reinstall the app, just launch App Store and install it again from there. No Delete button showing on the app icon? It means you can not uninstall clip snapshot through Launchpad. Below are two additional uninstall approaches you can adopt.
For the apps not installed through App Store:
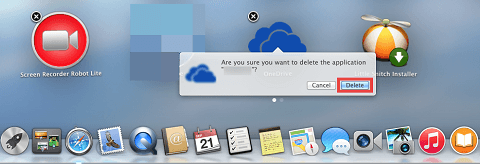
- Open the Finder on your Mac, and click on the Applications folder on the sidebar.
- Search and locate clip snapshot in the Applications folder, then drag its icon with your mouse to the Trash icon (located at the end of the Dock), and drop it there.
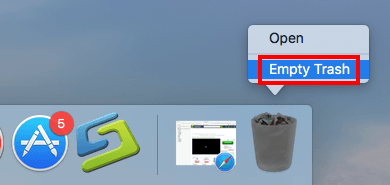
- Right click on the Trash, choose Empty the Trash, and click on Empty Trash again.

There are other options to uninstall clip snapshot from Applications folder: (1) right click on clip snapshot, and choose Move to Trash option from the contextual menu; (2) select clip snapshot, head to the File menu on the top bar, and choose the Move to Trash option.
Warning: once you empty the Trash, all the things inside including clip snapshot will be permanently deleted from your Mac, and the act is irrevocable. So make sure that you have not mistakenly placed any files in the Trash before carrying out the empty step. As for emptying the Trash, you can also choose File menu > Empty Trash option.
For the apps coming with dedicated uninstaller:
It should be pointed out that, some large software that are integrated deeply with macOS may be hard to get rid of by the aforementioned methods. Luckily that kind of applications usually come with a dedicated uninstaller to help users effectively uninstall the main app as well as associated plugins, files, or bundled software.
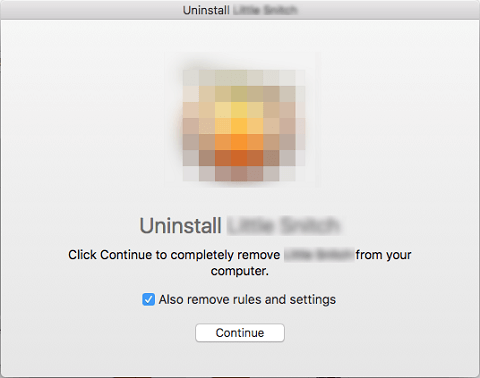
When you locate clip snapshot in the Finder and find it is in a folder, then scroll through the application’s folder to check if it comes with the dedicated uninstaller. If there is an application with the name of Uninstall, just double click to launch the specialized uninstaller, and follow the onscreen instructions to complete the removal of clip snapshot.
If you are still no sure how to uninstall clip snapshot properly, you may visit its official website and look for downloadable uninstaller or uninstall instructions there.
How to Manually Delete clip snapshot Leftovers
Most applications do not run background processes or change system settings files, and their preferences and support files left after the uninstallation may not do much harm to your system. However, for the large, problematic, or malicious software, you may need to clear up the associated components scattered around macOS after you uninstall clip snapshot. If you are trying to remove corrupted components, reinstall clip snapshot, or reclaim disk space, it becomes necessary to remove all the items pertaining to clip snapshot.
clip snapshot components include the app itself, preferences files, supporting plugins, bundled program and sometimes kernel extensions. To fully detect those remaining files, there are two locations (/Library and ~Library) you can explore on drive. The first is at the top level of the hard drive and the second is inside your Home folder.
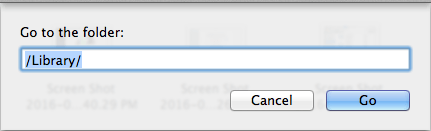
Delete clip snapshot components in /Library
- Open the Finder, head to the Menu Bar, and select Go > Go to Folder…
- Type the path of the top level Library on hard disk: /Library, and hit Enter key.
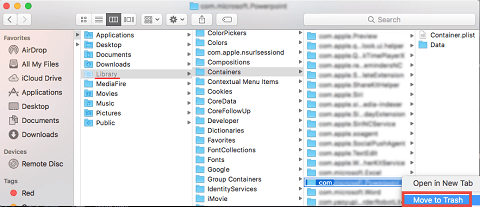
- In the following set of folder locations, search for the items whose names contain the keyword(s) of clip snapshot or its vendor: /Library, /Library/Caches, /Library/Preferences, /Library/Application Support, /Library/LaunchAgents, /Library/LaunchDaemons, /Library/PreferencePanes, /Library/StartupItems
- Identify the matched files and folders, and then move them all to the Trash.
Some of those related items may not be so obvious to find and locate manually. You could do a web search about the exact components and default locations for clip snapshot. Experienced users can utilize the Terminal app to seek out and remove app fragments.
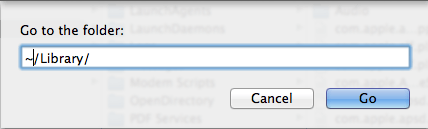
Remove clip snapshot components in ~/Library
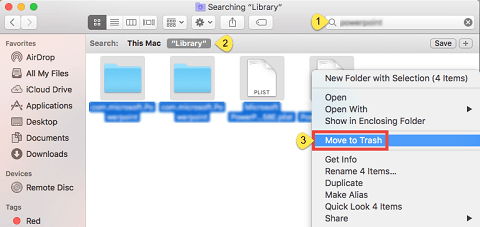
- Go ahead to open up the user library inside home folder: ~/Library.
- Type the keywords of clip snapshot in the Search Bar, and then click on "Library" button.
- Identify matched items in results, right click on them and choose Move to Trash.
- Empty the Trash after deleting all clip snapshot remnants. If you are prompted that an item is “in use and cannot be deleted”, reboot your Mac and try to empty the Trash again.
Notice: Before removing files or folders in search results, make sure to identify the accurate components of clip snapshot, because mistakenly deleting other apps’ files (or system settings files) may trigger malfunction of affected apps or even your system.
Manually detecting and deleting clip snapshot remnants could be risk-taking, time-wasting and low-efficient. We notice that many Mac user have difficulties in tracking down the clip snapshot vestiges, and also the final result of uninstallation may not be so satisfying as expected. Incomplete/unsuccessful uninstallation often happens especially when you are tackling corrupted, stubborn, notorious, or malicious applications. If you are looking for a hassle-free way to perfectly uninstall clip snapshot, we highly recommend you to utilize an professional, reputable uninstall tool to handle the task painlessly.
To sum up, this post offers multiple ways to uninstall clip snapshot from Mac computer. Each option has its own advantages and requirements. If you prefer to get rid of clip snapshot smoothly and without any trouble, Osx Uninstaller is undoubtedly a good helper. If you insist on removing clip snapshot on your own, the manual approaches also work well.

Comment